Remote-controlled robot using XBees and Ada
As a continuation from my motor shield article, I put my motor shield and Arduino combination on wheels and added a wireless shield to go with them.
Building the device
Required parts:
- Arduino UNO or Duemilanove
- SeeedStudio Motor Shield
- Arduino Wireless shield
- XBee Explorer USB
- Two XBee Series 2 devices
- Two motors and wheels for them
- One chassis
- Soldering equipment, a few wires
Optional parts:
- Two 2x Crimp connector housings (Pololu product 1901)
- Male Crimp Pins (Pololu product 1931)
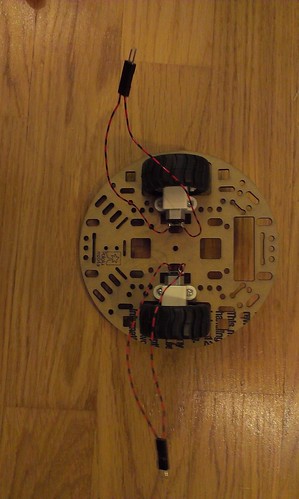
Assembling the robot was relatively easy, since I used ready-made shields. Only things you need to solder, are wires from the motors to the motor shield.
First, I put together the chassis:
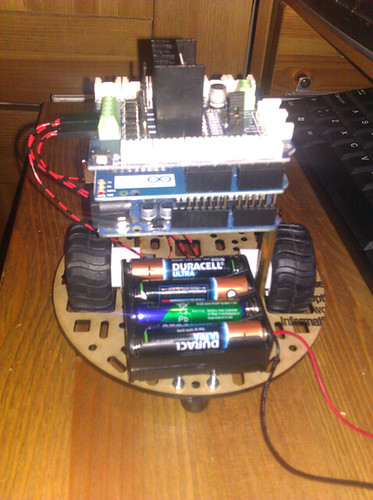
And after that Arduino, XBee shield, and the motor shield in that order.
Configuring XBees
I used XBee Series 2 devices, and the setup is documented quite nicely in Arduino guides.
In my setup XBee A is coordinator and transmits data to XBee B, which is a router, and XBee B sends data to XBee A. Both XBees use AT mode, since that is easier to work with than API mode.
Code
The code was surprisingly simple, because, as mentioned, I used XBees in AT mode and by default XBee is wired to the (first/only) UART port of Arduino.
Using the existing motor shield code as a base, I needed to add only initialization for the second motor, functions to handle forward, backward, and turning, and commands received via XBee.
MCU.PRR_Bits (MCU.PRTIM1_Bit) := Low;
TCCR1A_Bits := (COM1A1_Bit => True, -- COM1A1 + A0 => motor 1
                COM1A0_Bit => False,
                COM1B1_Bit => True, -- COM1B1 + B0 => motor 2
                COM1B0_Bit => False,
                WGM10_Bit  => True,
                WGM11_Bit  => False,
                others => False);
TCCR1B_Bits := (WGM12_Bit => True,
                WGM13_Bit => False,
                CS10_Bit => True,
                CS11_Bit => False,
                CS12_Bit => False,
                others => False);
MCU.OCR1A := 16#A2#;
MCU.OCR1B := 16#A2#;
...
C := AVR.UART.Get;
if C = 'F' then
   All_Forward;
   AVR.UART.Put (C);
   AVR.UART.Put (" OK");
   AVR.UART.CRLF;
elsif C = 'D' then
   Turn_Left;
   AVR.UART.Put (C);
   AVR.UART.Put (" OK");
   AVR.UART.CRLF;
elsif C = 'G' then
   Turn_Right;
   AVR.UART.Put (C);
   AVR.UART.Put (" OK");
   AVR.UART.CRLF;
elsif C = 'S' or C = 'C' then
   All_Stop;
   AVR.UART.Put (C);
   AVR.UART.Put (" OK");
   AVR.UART.CRLF;
elsif C = 'V' then
   All_Backward;
   AVR.UART.Put (C);
   AVR.UART.Put (" OK");
   AVR.UART.CRLF;
end if;
The rest of the code can be found from arduino-rc-robot repository.
Finally, I connected XBee Explorer USB to my PC, opened a terminal program, and started sending control commands.